Modality Circumcision Admin Booking
Modality Circumcision Booking Tutorial
Checkfront Dashboard
First of all, you will need to access https://modalitycirc.checkfront.com/, where you will need to use your provided login details to access the dashboard, which will look like this:
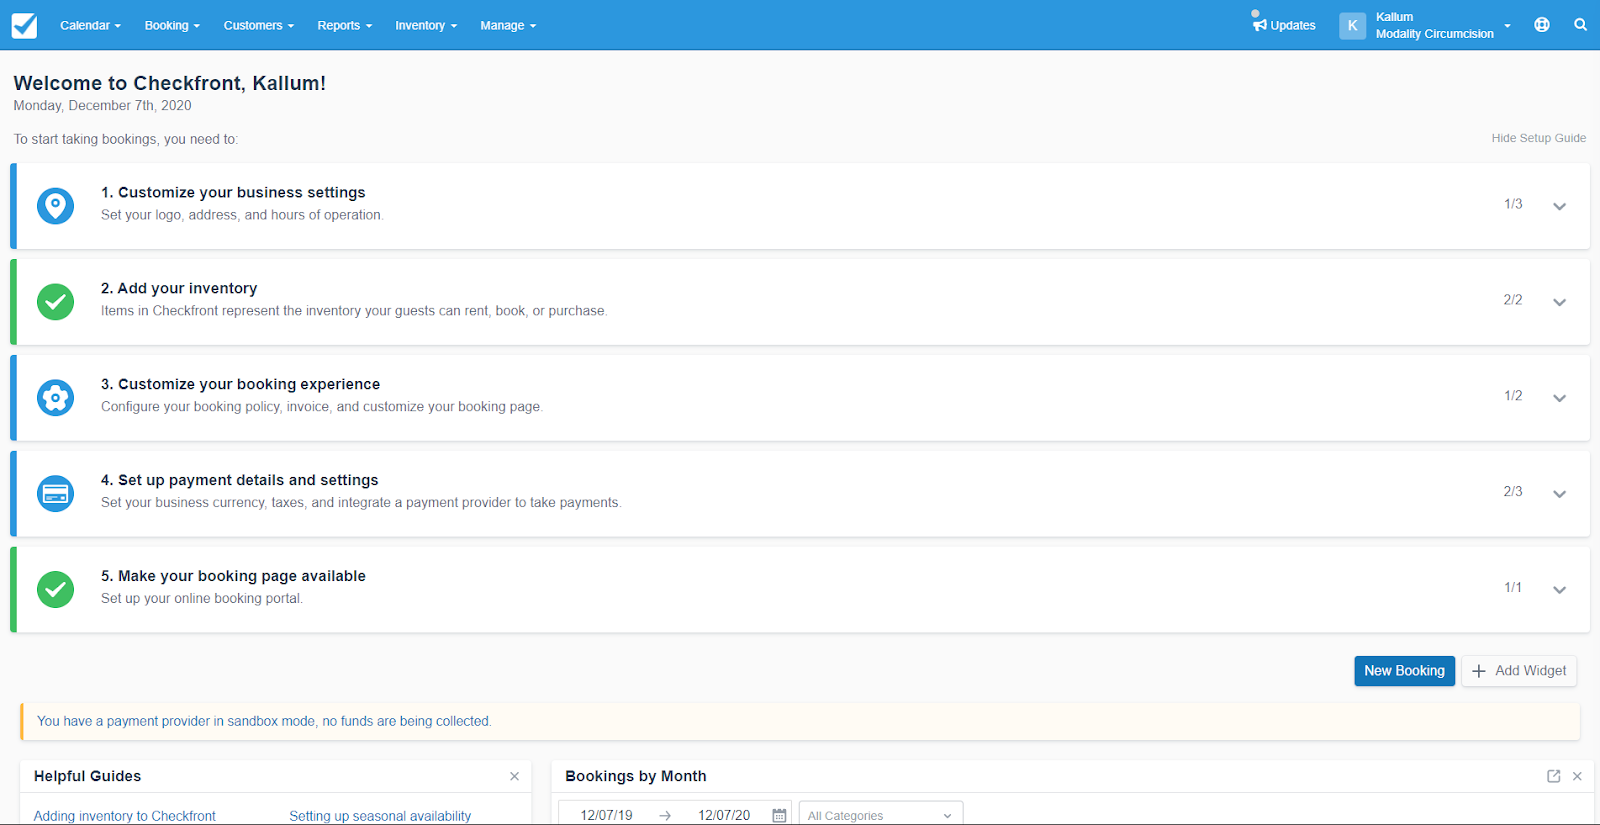
From here you will be able to view current bookings, manage future bookings and create new ones.
Creating New Bookings
To start with, we’ll create a new booking. This option is possible for all age groups, however, we’ll first go through creating a booking for the Children age category since this is only possible through this dashboard. To start, access the bookings heading at the top of the page and click “New Booking”:
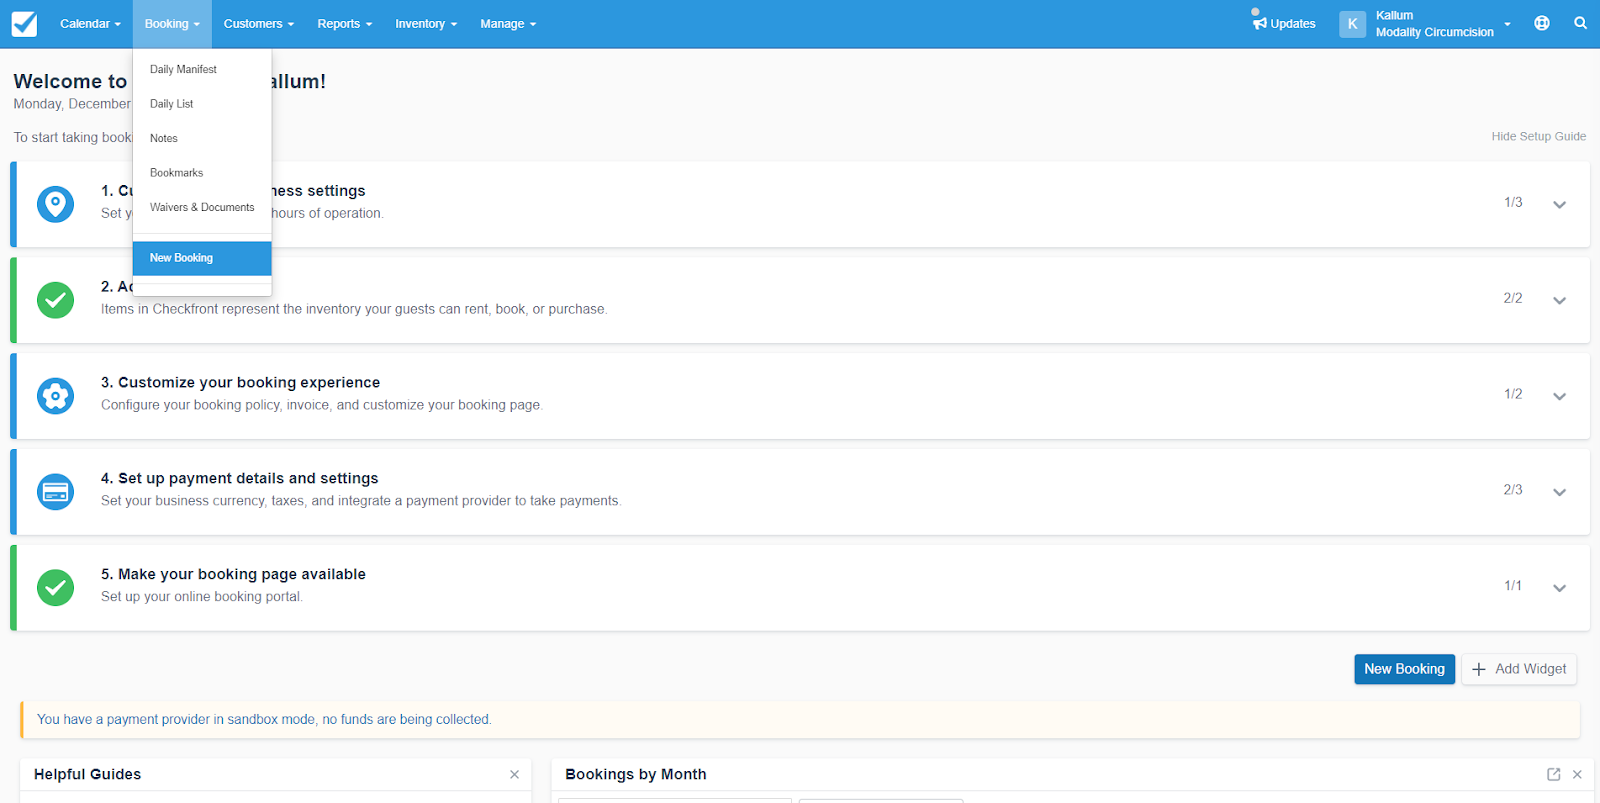
New Booking
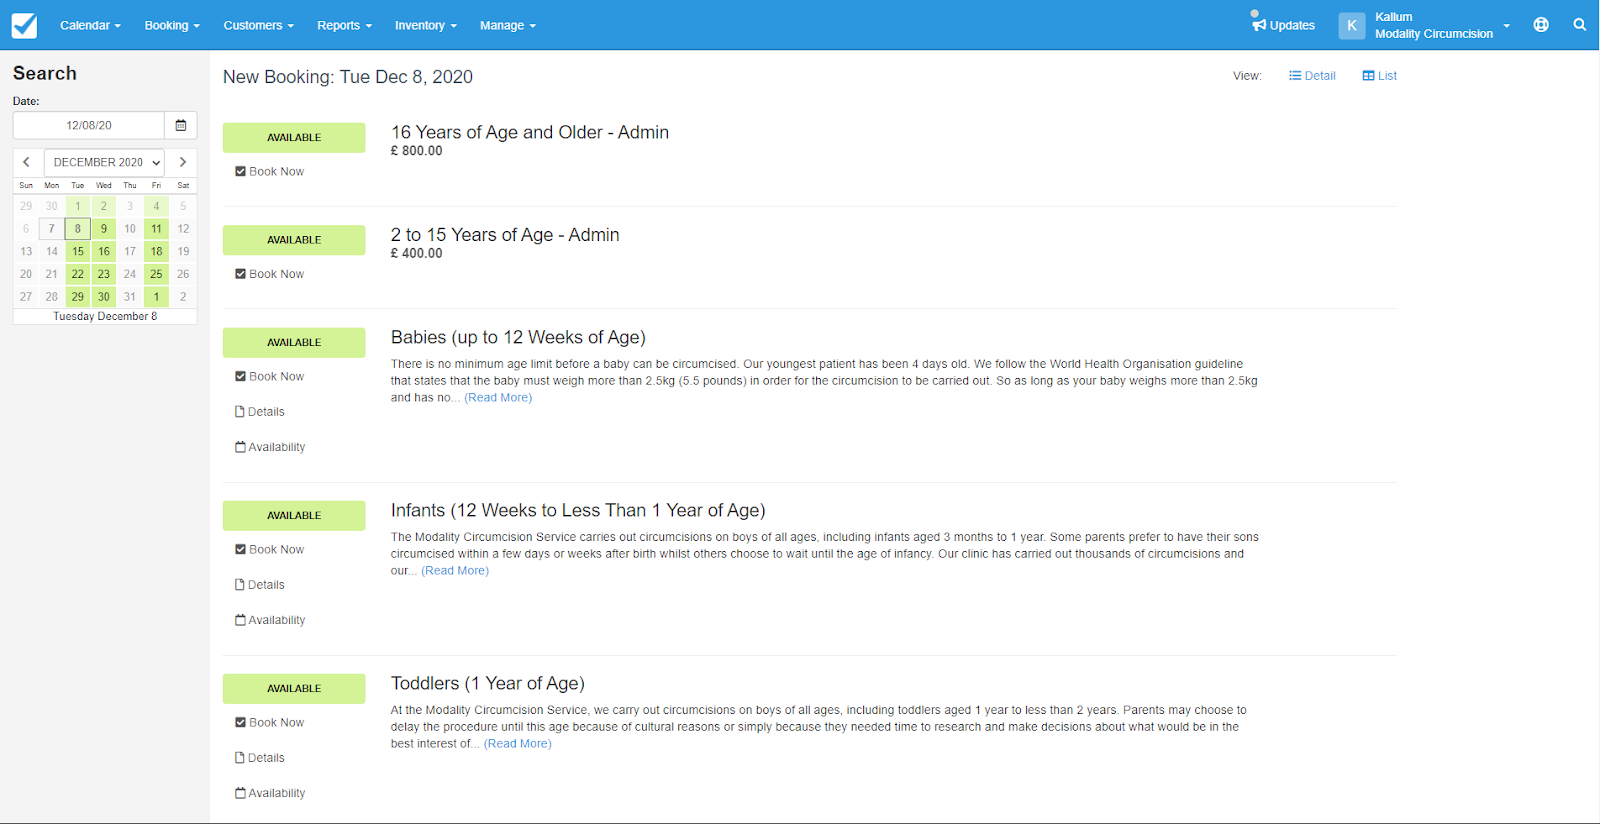
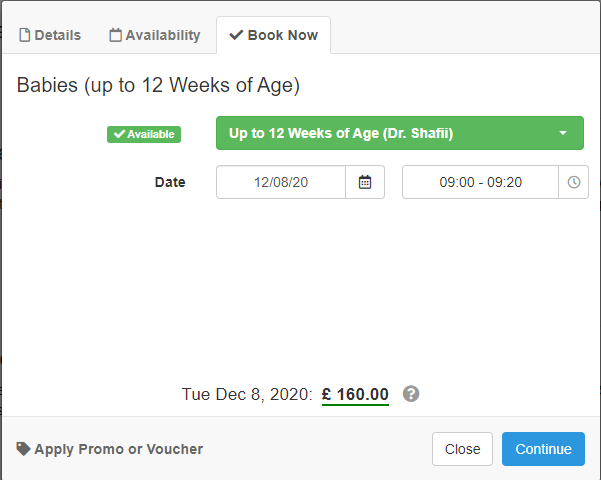
Here you will see the list of Modality Circumcision Services, based on the age group. Here you will click “Book Now” (highlighted below) below the desired age category to open it’s context menu.
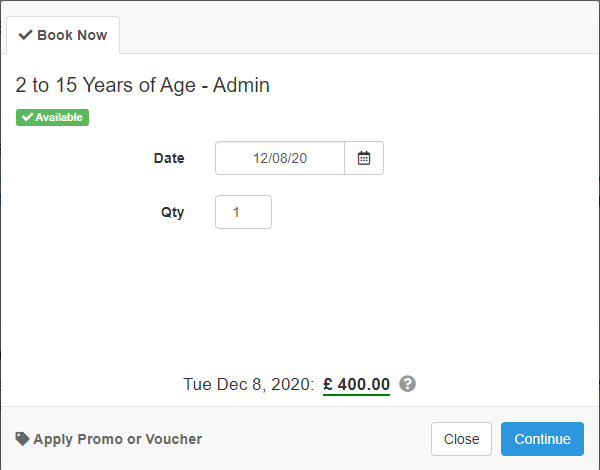
This opens a popup as displayed below, showing the date and time options for that age group. Please note: these options will differ depending on what age group is selected. Below is the Children 2-15 years option and the Babies up to 12 weeks option. When booking one of the admin-only choices, you will only need to select a date. The other three options that appear on the main website will require the selection of a date and time. After selecting, press continues to move on.
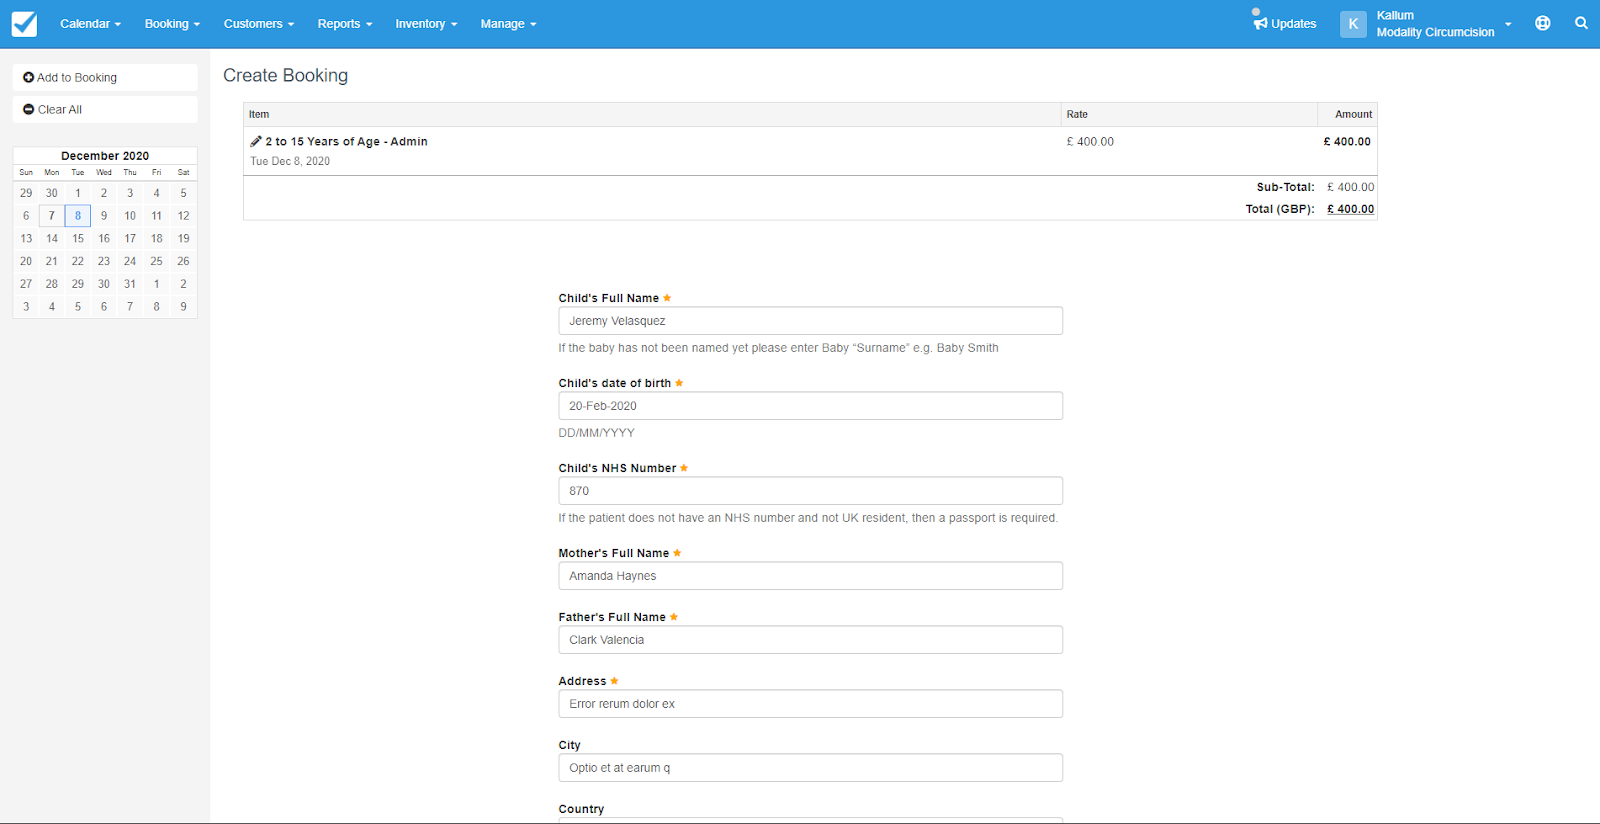
On the next screen will appear a form, to be completed with the patient’s data. See the example below with dummy data.
Upon filling in the information, this will take you to the invoice page:
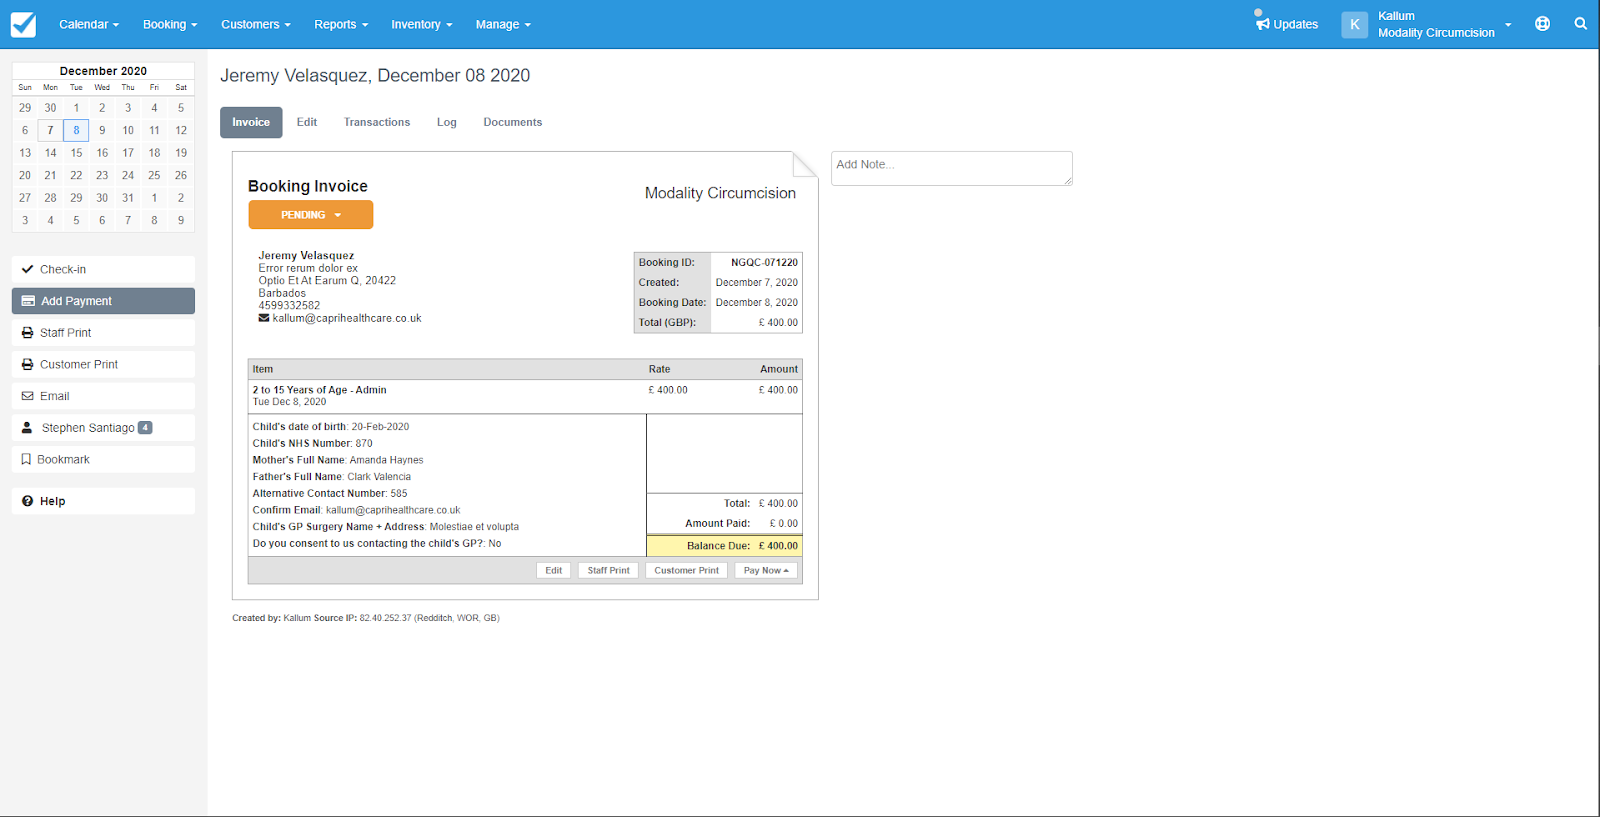
This page will display the customer and patient information, along with a coloured button at the top, displaying the status of the booking. Highlighted above is the “Add Payment” button, which we will press to add the deposit:
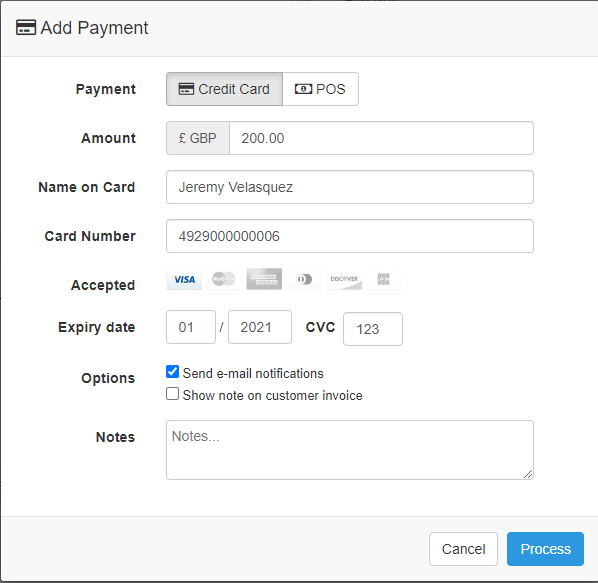
Here we will add the customer’s card details and the amount being paid. Please note that the card details used here are test details for use during testing only. Here you can add any necessary notes and process the payment.
This will bring you back to the invoice page, which will now display the “Deposit” status in the coloured box.

Along with this, you can check the customer in when they arrive, and check them out when they leave, to keep track of timings and add the final portion of the payment when it is due.
Related Articles
Modality Circumcision Disabling Appointment Types
Modality Circumcision Disabling Appointments Tutorial Checkfront Dashboard First of all, you will need to access https://modalitycirc.checkfront.com/, where you will need to use your provided login details to access the dashboard, which will look ...How to check appointment booking?
You will be able to check the booking details from the WordPress administration area (Appointment Hour Booking Settings) into the bookings list with options to export the bookings to CSV/Excel files.What functionalities are implemented on the Admin Dashboard of v-Consult?
The following functionalities are implemented on the dashboard. The Doctor/admin can View the consultation request Invite the patient for video consultation Send a prescription through SMS and Email Send advice and guidance through SMS and Email ...How to change the content of the online consent form in Modality circumcision services?
Step 1: Log in to the check front https://modalitycirc.checkfront.com/ Step 2: Select the Waivers and documents under Bookings Step 3: Select the Template and age group Step 4: Change the content and SaveHow do I access the SagePay User Guide?
Please click the link shown below to access SagePay https://www.sagepay.co.uk/file/27631/download-document/my-sagepay-guide.pdf?token=4X50vuI4E4pe5jURdH7OmSywsi7ArNHAs-t4xyBs5j8